Difference between revisions of "Getting Started Guide (Arma 3)"
| Line 30: | Line 30: | ||
=== <strong>Modpack Install - Updates</strong> === | === <strong>Modpack Install - Updates</strong> === | ||
| − | + | Upon the first install of the modpack and or upon updates to the ACRE2 modification.<br> | |
| − | Launch | + | |
| − | + | Close Teamspeak 3<br> | |
| − | + | Launch ArmA 3 with the United Operations Moddpack Collection.<br> | |
| + | ArmA 3 will then install any ACRE2 Updates to Teamspeak 3.<br> | ||
[[File:a3_acre2_install.png]] | [[File:a3_acre2_install.png]] | ||
| + | |||
| + | After ACRE2 Updates are installed, you can then reopen Teamspeak 3 and Connect to the server.<br> | ||
=== <strong>Teamspeak 3 - Connect to Server</strong> === | === <strong>Teamspeak 3 - Connect to Server</strong> === | ||
Revision as of 01:45, 20 June 2017
This Getting Started Guide for ArmA 3 provides basic guidance on getting started with ArmA 3 at United Operations. It covers the proper synchronization to our modpack using Steam Workshop, how to connect to our servers, and the important things you need to know for your first play session at UO as well as further reading.
Contents
Prerequisites
Before you start playing ArmA 3 with us you'll need to acquire a few prerequisites: Teamspeak 3 for in-game and out-of-game communication and a Forum Account, you will also need to link your Teamspeak 3 profile with your forum account. For a walk through on installing and setting up our prerequisites see:
Addon Synchronization - Steam Workshop
Before you can successfully connect to our ArmA 3 servers you need to download our modpack. If you do not already have any of our mods at all this can take a considerable amount of time as the mods you need to download are considerable in size. If you have played elsewhere with mods before coming to play with us there is a likelyhood you already have some of our mods, in that event we will simply re-use those mods and the download time will be smaller.
Please launch the game at least once normally, through Steam, to ensure that all updates are processed fully. Do this before you continue with this guide or attempt to install any mods, and after all updates to ArmA 3.
Required - Modpack Collection
Install the Modpack/Collection - United Operations - Modpack Collection
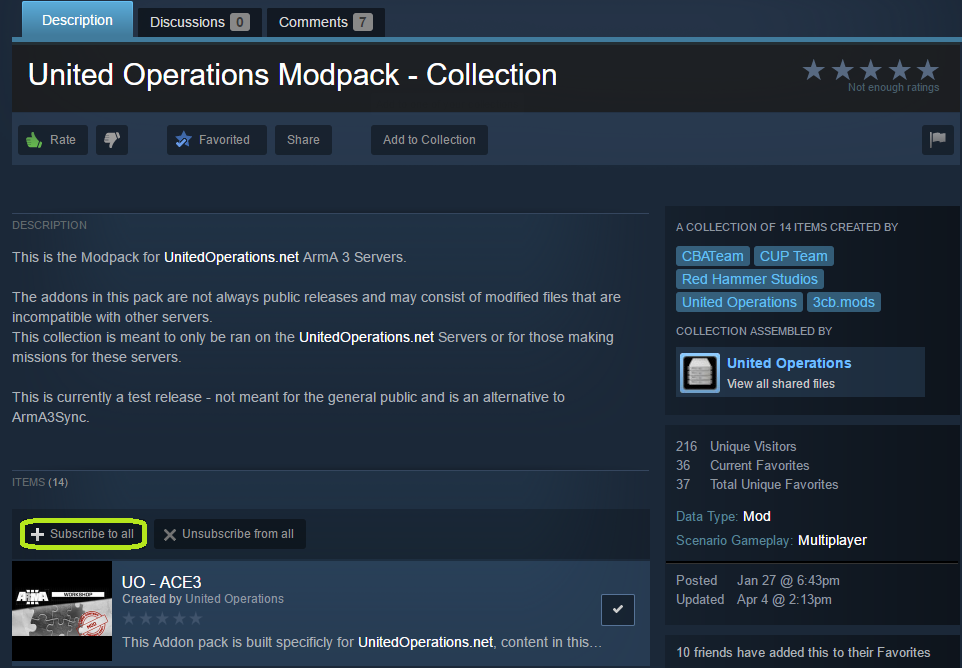
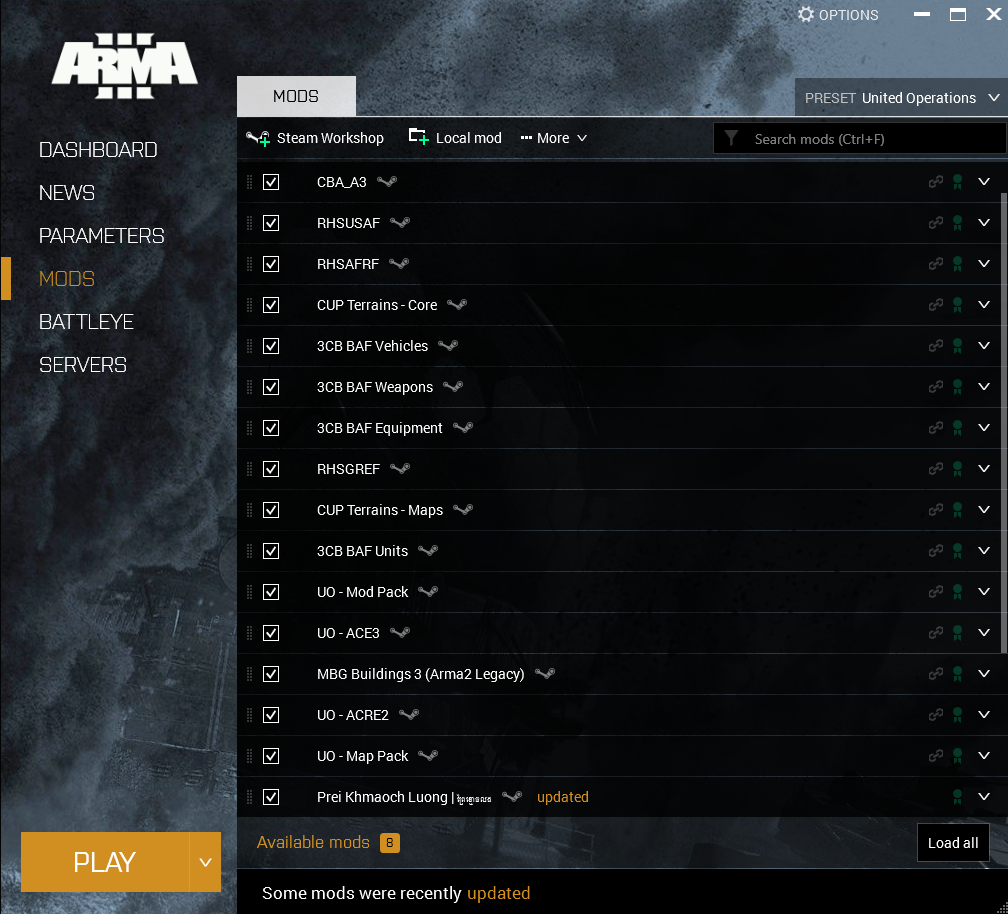
Confirm that The following addons are selected in the ArmA 3 Launcher.
Once Subscribed, the following mods should now appear in your ArmA 3 Launcher - Check-mark all of the following mods.
If these addons are updated, Steam will automatically download these in the background, or when you are connected to Steam.
Optional - Bypassing BattlEye
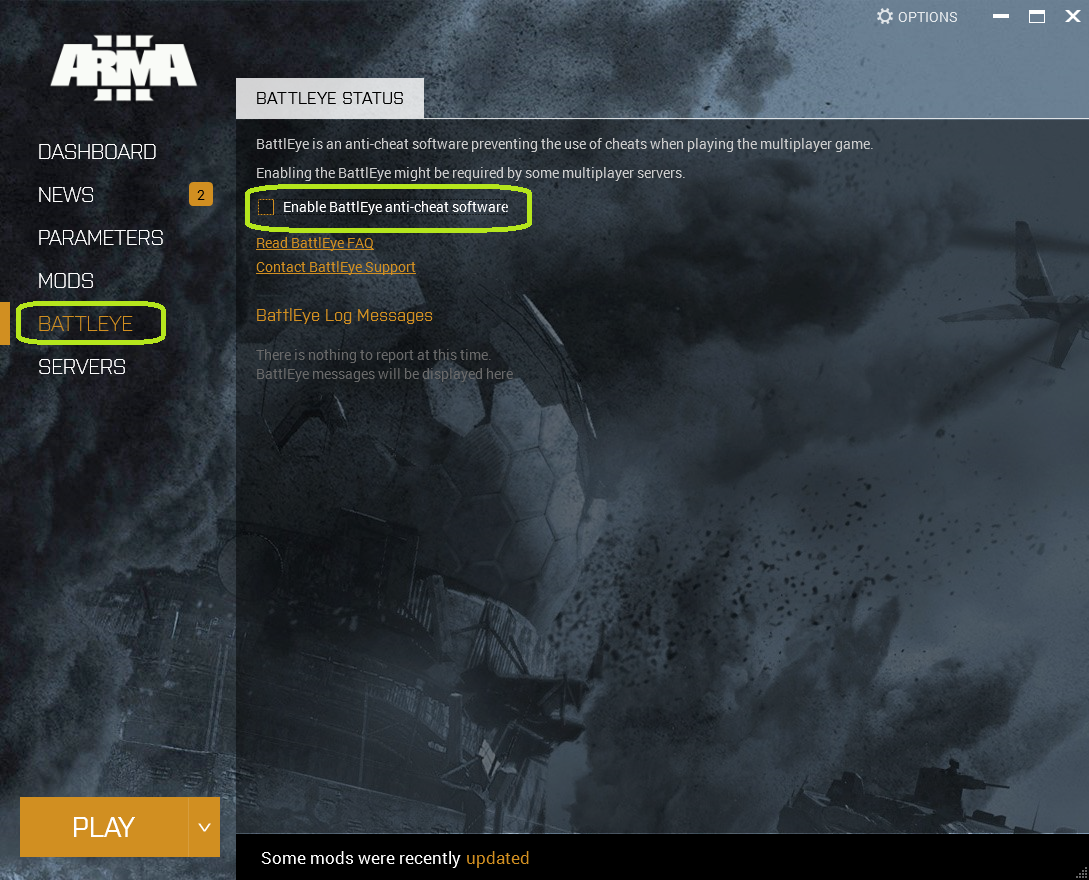
Due to the development of content in our community, we frequently are running development versions of software. These updates may require BattlEye to be disabled to connect to the server.
To connect to the servers without BattlEye, select the Battleye Tab in the launcher and uncheck "Enable BattlEye anti-cheat software".
Connecting to the Server - General Info
Server Passwords In order to connect to our servers, you will need to obtain the Server Password - Located Here [1].
Modpack Install - Updates
Upon the first install of the modpack and or upon updates to the ACRE2 modification.
Close Teamspeak 3
Launch ArmA 3 with the United Operations Moddpack Collection.
ArmA 3 will then install any ACRE2 Updates to Teamspeak 3.
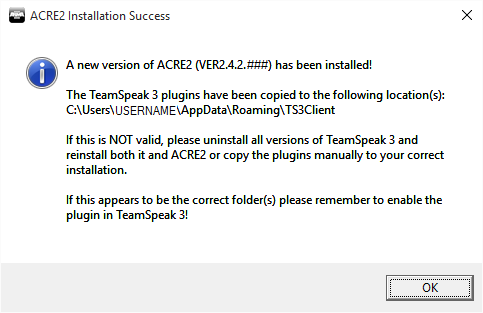
After ACRE2 Updates are installed, you can then reopen Teamspeak 3 and Connect to the server.
Teamspeak 3 - Connect to Server
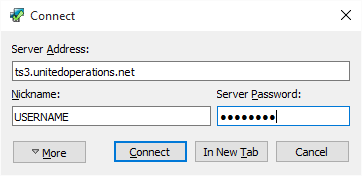
Once you have the passwords from above, Open Teamspeak 3 and select the Connections Menu, then choose Connect. Enter the following information.
- Server Address: ts3.unitedoperations.net
- Nickname: Your Name Here
- Server Password: From Above
Feel free to bookmark the server to save this information.
ArmA 3 - Connect to Server
Once you have the password start ArmA 3, navigate to the Multiplayer server browser, click the tab labeled "Direct Connect" in the tom left-hand corner and enter the following information into the corresponding boxes:
- IP: arma3.unitedoperations.net
- Port: 2402
Then click OK. Then enter the password. You will now be connected to the game server.
ArmA3 - Saving Favorite Servers
One result should appear, save this server as Favorite. After you have played on the server once, it will appear in your recent servers, and you can favorite the server by enabling the gold star infront of the server name. This will cause the server to appear in the ArmA 3 Launcher.
Misc - Help
If the event you cannot find our server using the above method please contact a Regular on our Teamspeak for assistance.
Your First ArmA 3 Session
When you first connect to our server you will be presented with the slotting screen. Here at UO we allow the mission commander to select which slots he wishes to play his mission with; at the start of a mission one player will choose to command a mission then he will call which slots are available to be picked, once these slots have been called you will be permitted to start taking any of these slots, for your first few games at UO please restrict yourself to an infantry team-member and steer clear of high-value assets like aircraft and leaderships slots as these often require a lot more skill and experience and can potentially ruin the game for everyone if misused. If a game is already in process choose a slot in a squad that already has a leader.
It will likely take a few games for you learn the ropes of how we play here at United Operations, however, as long as you don't break any of our rules and abide by the United Operations Charter you should be fine. Simply let your fireteam leader know you are new and most of the time they will be very happy to help you out.
Troubleshooting
Having issues installing our modpack? Hop on over to our forums or Discord we'll be happy to help you out.
