DCS Mod Management
Jump to navigation
Jump to search
DCS mod management allows you to enable and disable mods for DCS. DCS can be modded in many ways that can drastically improve quality of life and gameplay. Using a mod manager though is needed as any updates to DCS act like a repair, any files that do not match the latest version will be deleted and restored. Using a mod manager, like JSGME, will allow you to enable and disable mods quickly and easily in the case of an update.
JSGME
- Download ModPack from https://gitlab.com/Nighthawk2174/uoaf-modpack-for-dcs
- Unzip JSGME_2.6.0.zip file
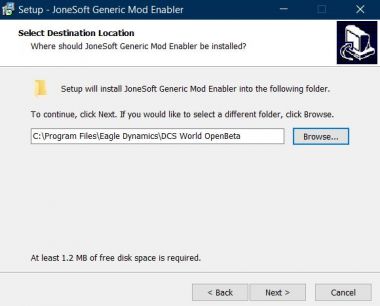
- Run the Setup.exe
- First Destination needs to be the root directory of the game you intend to mod.
- First Destination needs to be the root directory of the game you intend to mod.
- Create a folder named @MODS (note the @ at the beginning) in your DCS game install folder
- Drag and Drop the ModPack mods into the @MODS folder
- The top level folders will be the mod name. Then the subfolders in that mod folder are relative to the base install. So if you install a black dot labels mod, the directory structure would look like this: X:\DCS World OpenBeta\@MODS\UOAF1_Labels\Config\View. In this last folder, Labels.lua would be the only file in this case, representing the actual mod file.
- Run the JSGME.exe that was made on your desktop
- Enter the name of the Mod folder into the bottom left window and click ok
- Your mods should now show up in the main JSGME window that pops up
Enable/disable mods
- To enable a mod, select the mod profile (e.g. DCS), select a desired mod, and then press >.
- To disable a mod, select the mod profile (e.g. DCS), select the active mod, and then press <. The << button will disable all mods.
Take note if your forget to disable mods for a DCS update this will not break anything! Simple just disable all your mods and re-enable them!
